How To Build A Discord Command Bot With Supabase Edge Function

I’m a front-end developer and technical writer based in Germany. I currently use react - my favourite framework - and styled-components as my main tech stack on the job.
I like helping newbies grow to become the developers they want to be and land their desired tech jobs. One of the ways I do this is by hosting Twitter spaces (#NewbiesInTech) so that they can learn from experienced developers and be in the know.
I also like reading and sharing my knowledge in different ways (articles, tweets, code snippets etc). I'd keep this bio updated as often as I can.
Are you looking for a hassle-free way to build your Discord bots without the worry of setting up and maintaining servers? You've come to the right place!
Supabase, an open-source platform that combines a real-time database, authentication, storage, and more to simplify backend development, offers a feature known as Edge Functions. With Edge Functions, you can write serverless code that runs globally near your users, ensuring fast performance and reducing latency.
This tutorial will guide you through an easy and stress-free process of building your Discord command bot with Supabase Edge Functions.
Without further ado, let’s dive in!
Prerequisites
You need to set up the following to be able to follow along with this tutorial:
Creating Your Supabase Project
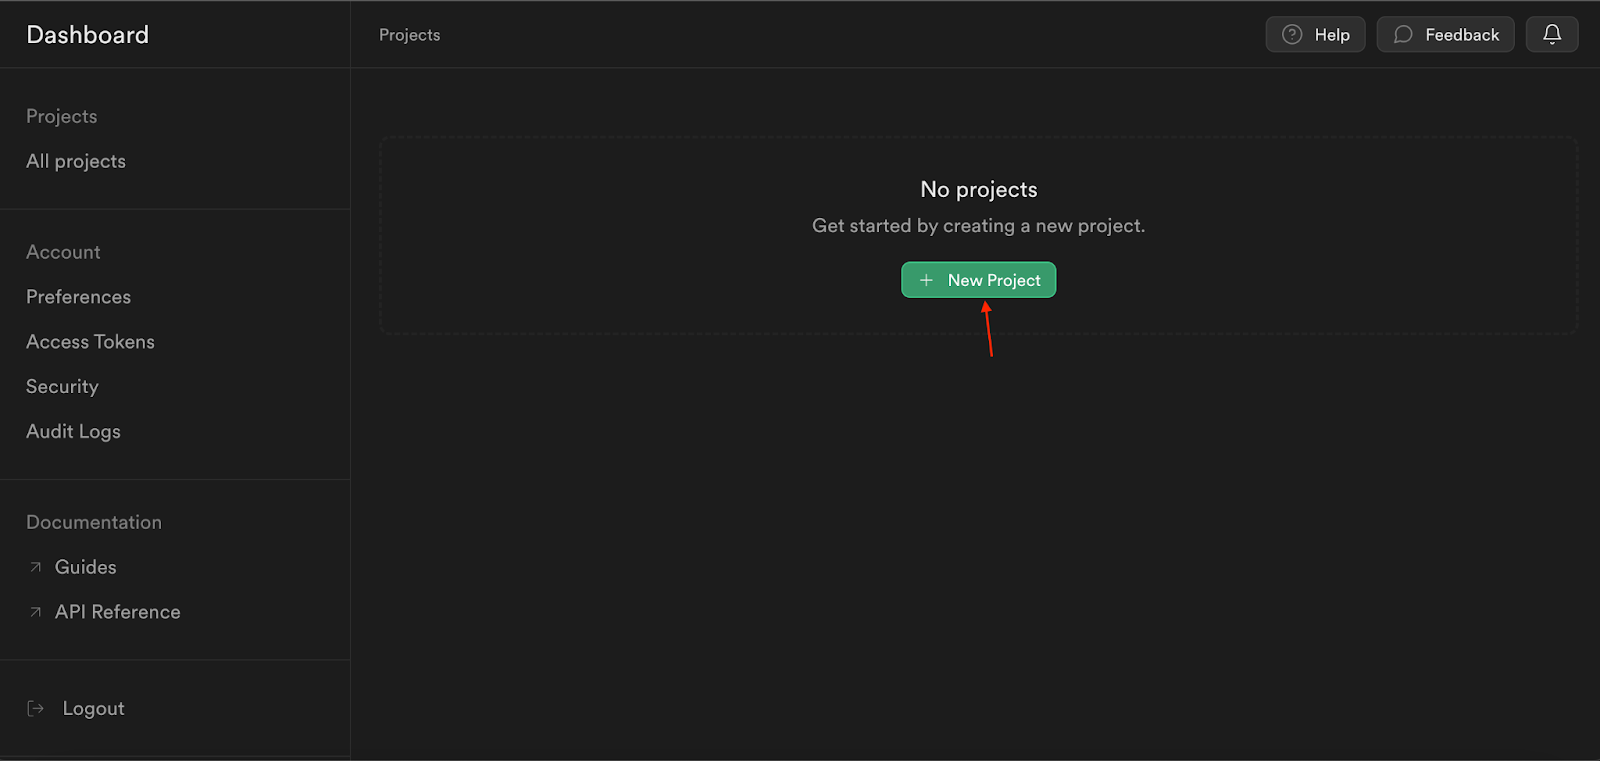
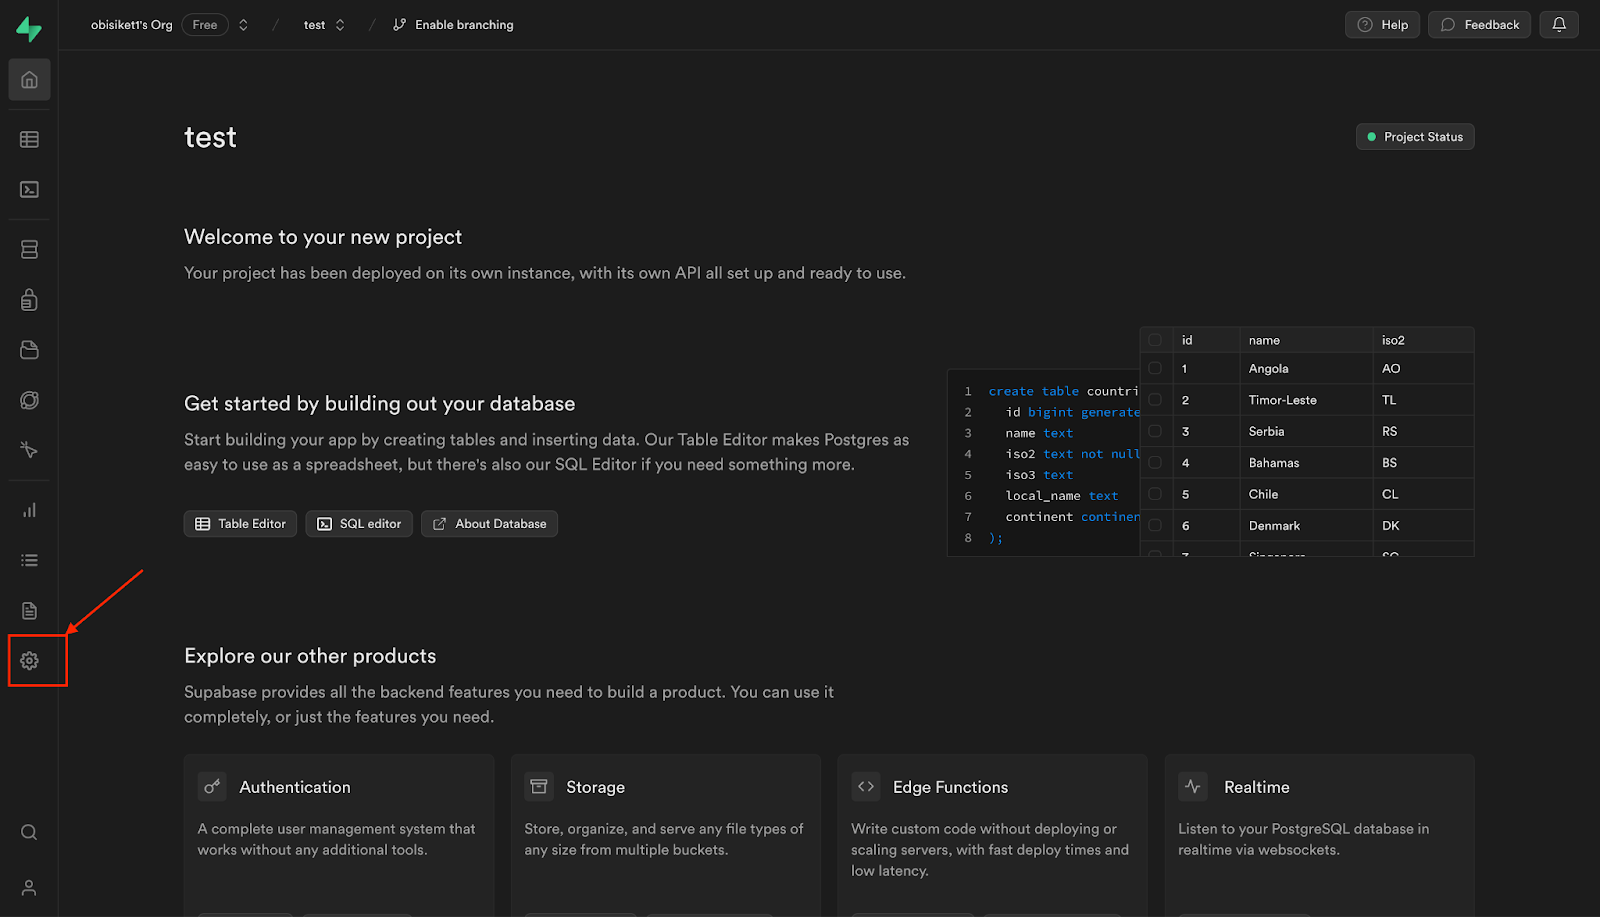
Log into your Supabase account and create your Supabase project to gain access to Supabase services. You’ll also gain access to your project ID and API key, which are required for using the Supabase SDK. Once you’re logged into your Supabase account, you will see your project dashboard. Click the New Project button as follows:
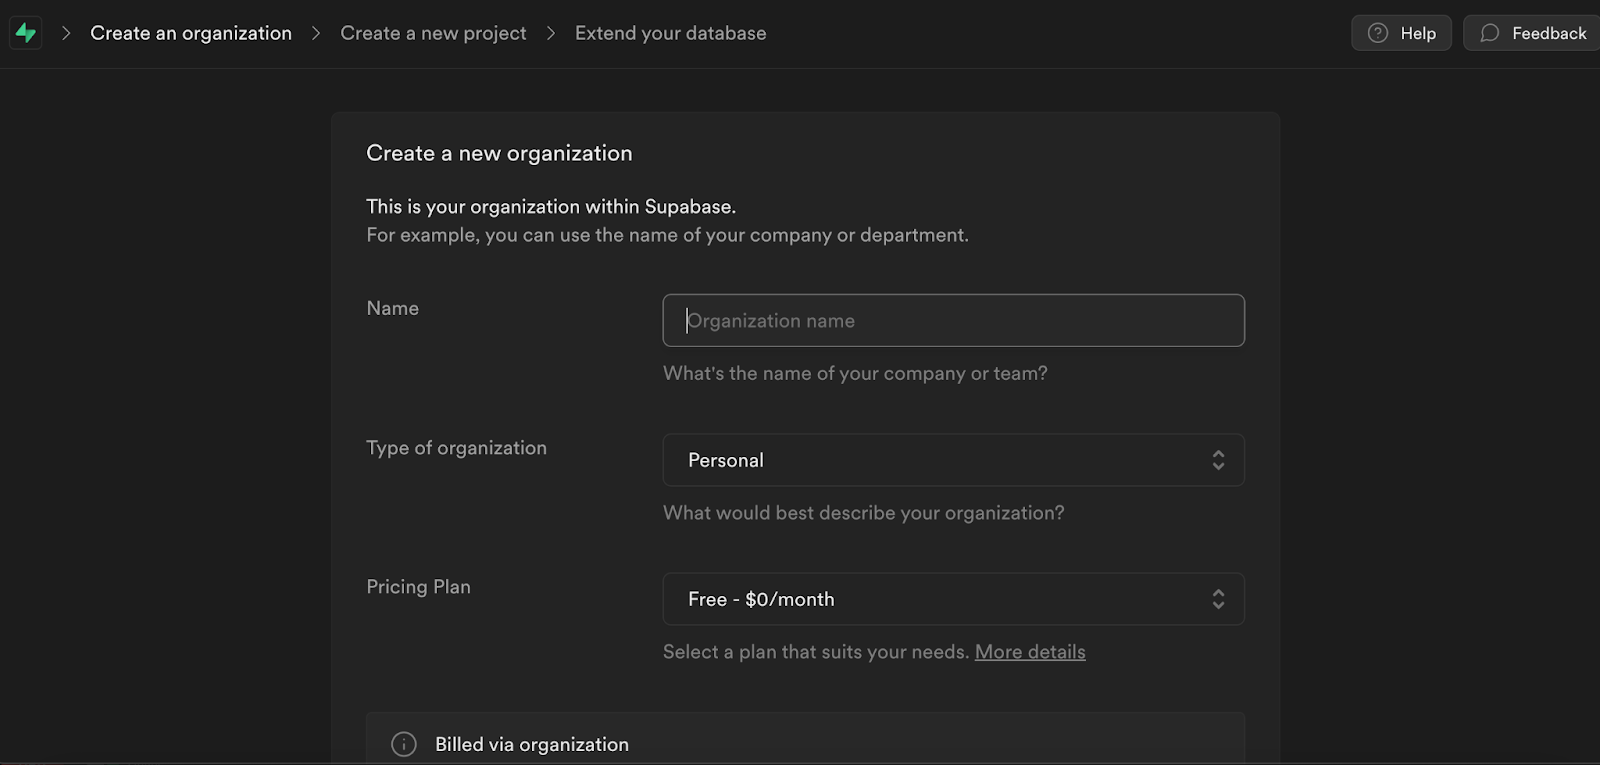
Next, you’ll be directed to a page to create an organization within Supabase, and your new project. Start with creating your organization by filling in the fields and choosing the free tier organization and clicking the Create Organization as follows:
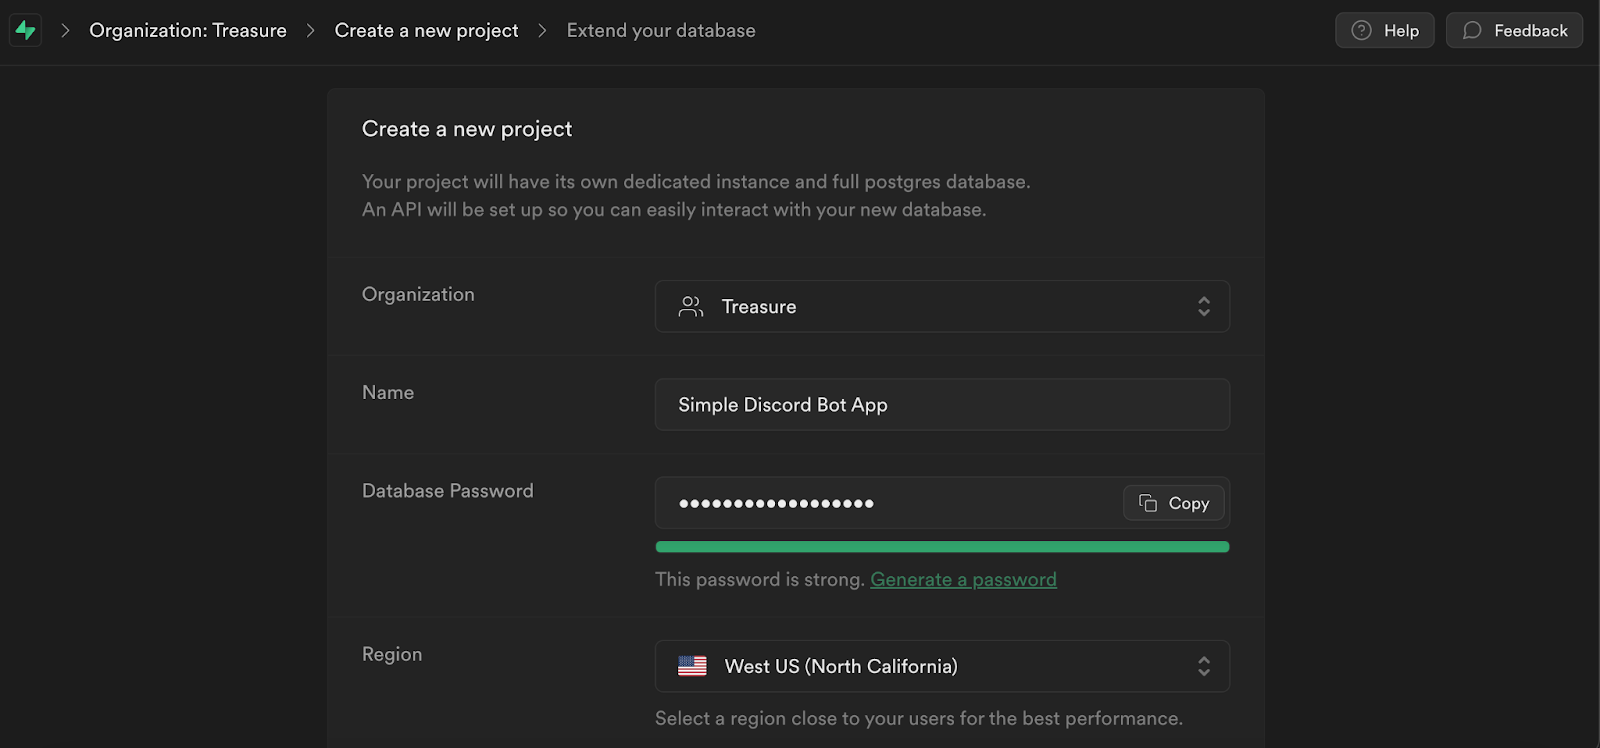
Next, create your new project by entering your project’s name and password and then selecting your region. Then, click the Create New Project button:
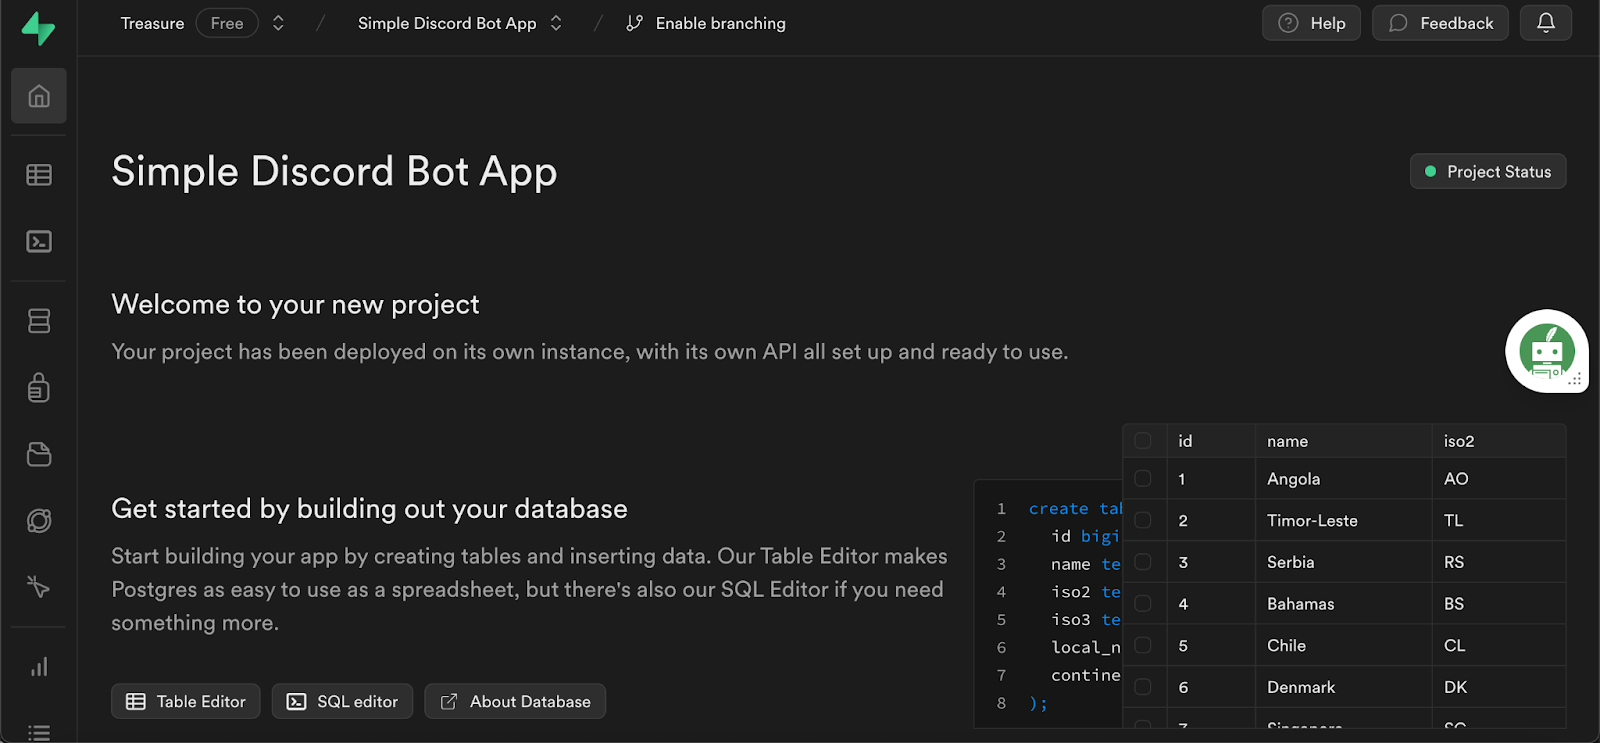
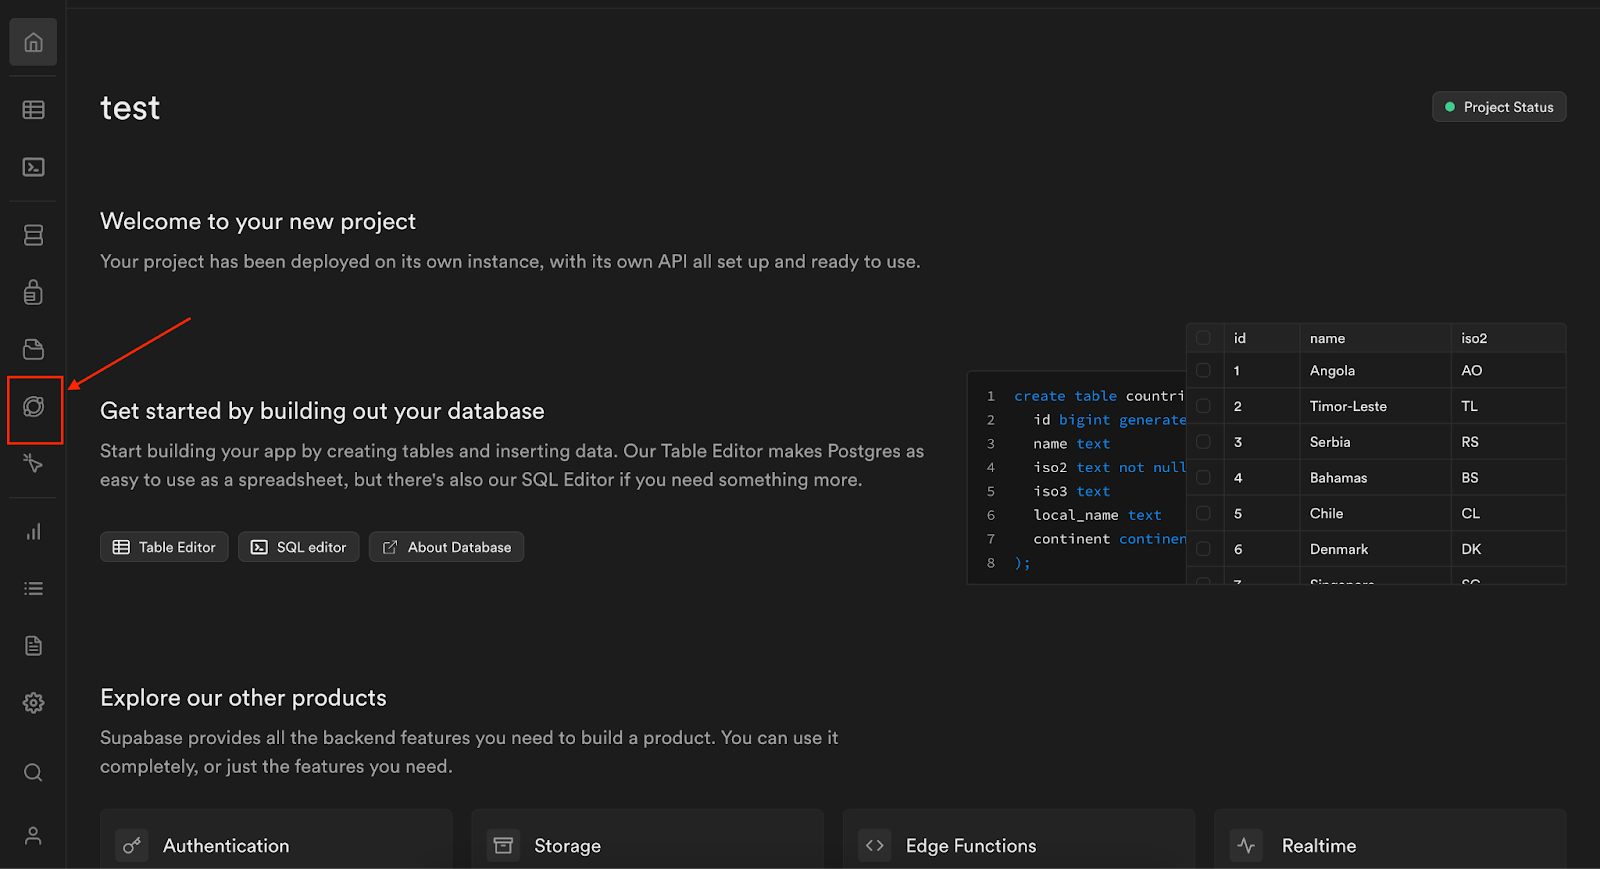
Afterwards, your project will be created and deployed on its instance with its API as follows:
Before you proceed you’ll need to obtain several values from your Discord Developer Portal, namely the public key, ID, and Bot token of your application in your Discord Developer Portal. They will serve as the values for the environment variables passed to your function at runtime.
Go to your Discord Developer Portal and click on New Application:
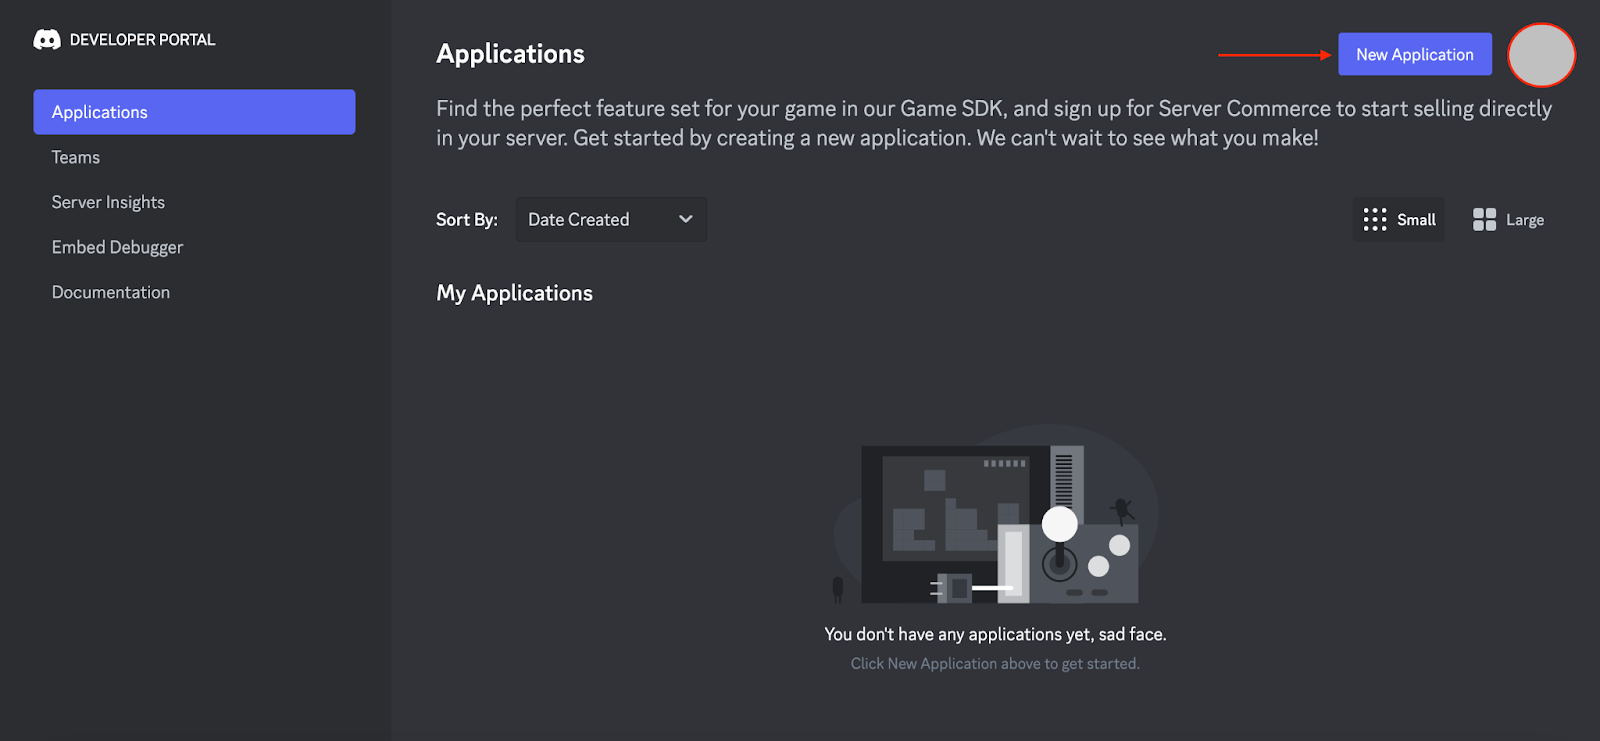
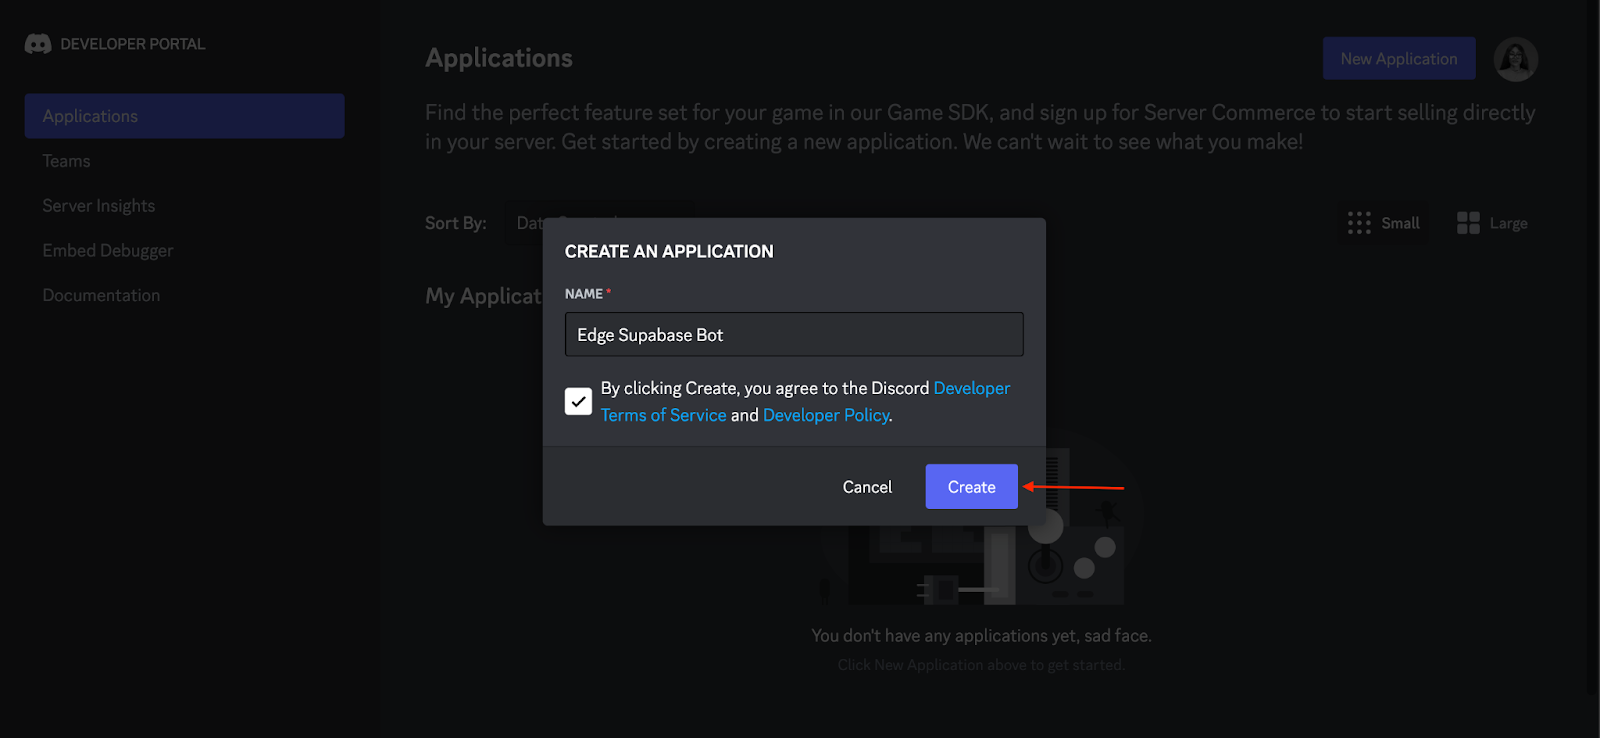
The developer portal will prompt you to create a new application and you can call the application Edge Supabase Bot and click the Create button as follows:
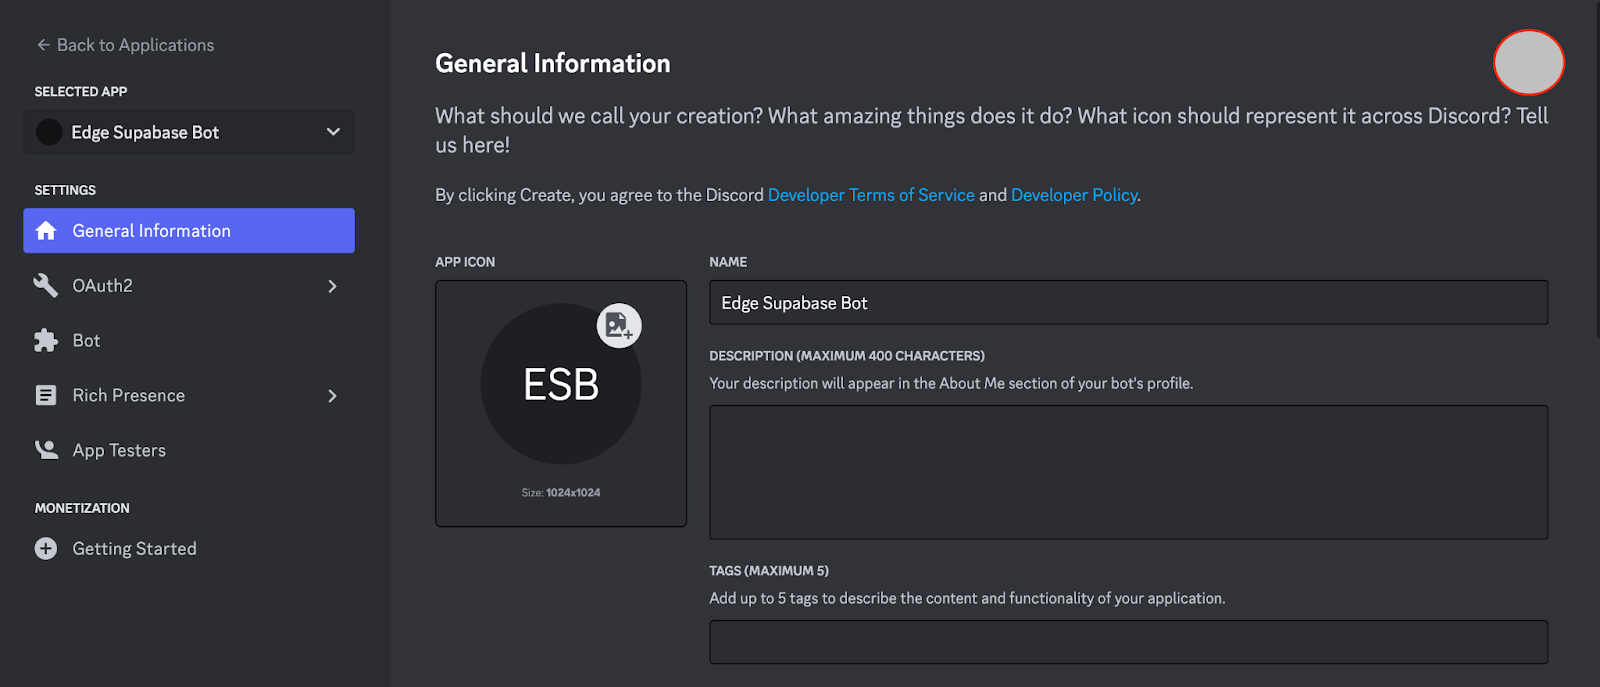
Afterward, a dashboard will be created for you to configure your bot, you’ll see a General Information section as follows:
Scroll down and you will notice your generated application ID and public key. Copy both of them as follows:
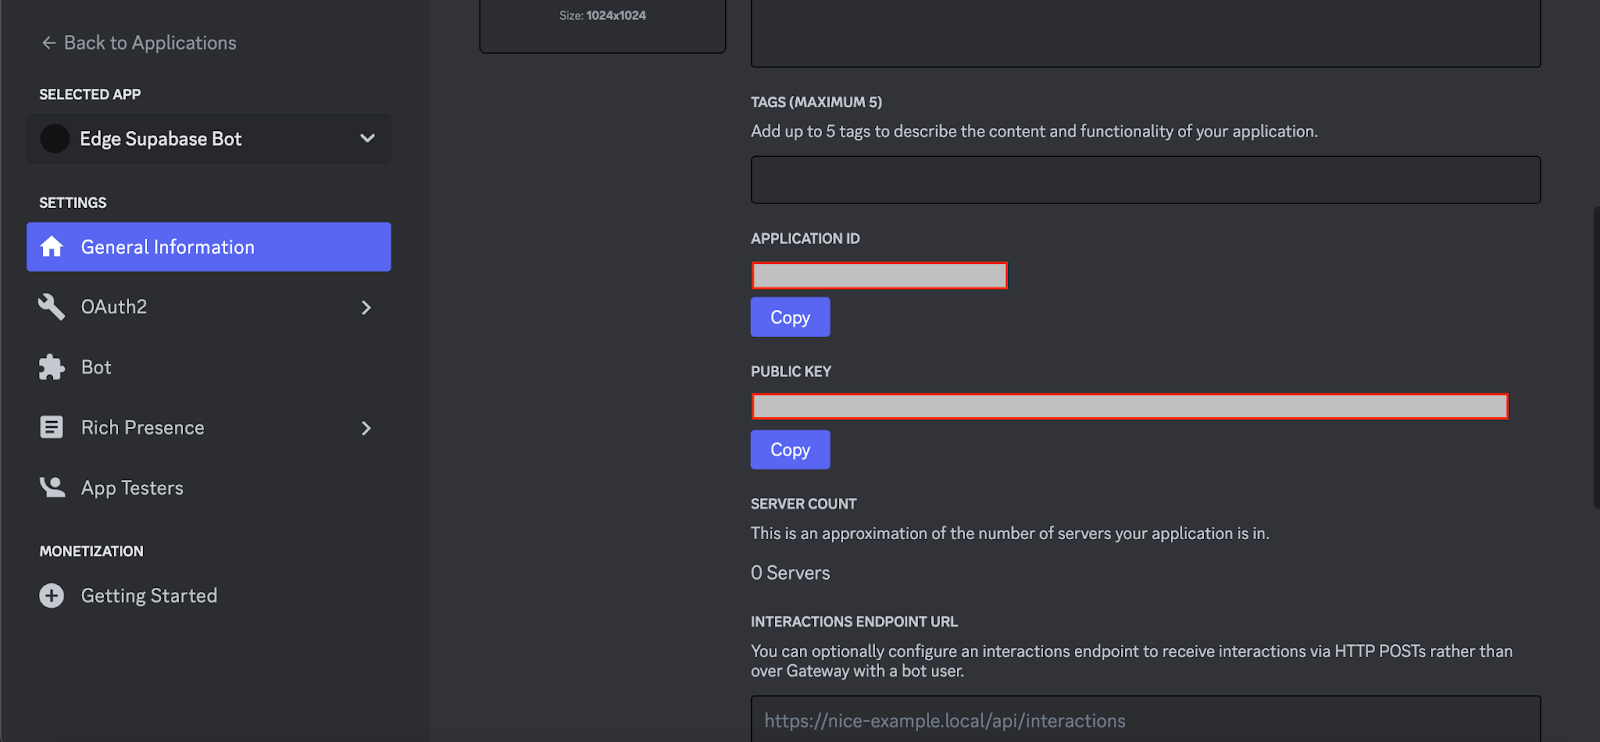
When you copy the Application ID and Public key, store it in a safe place as you will use it later in your tutorial.
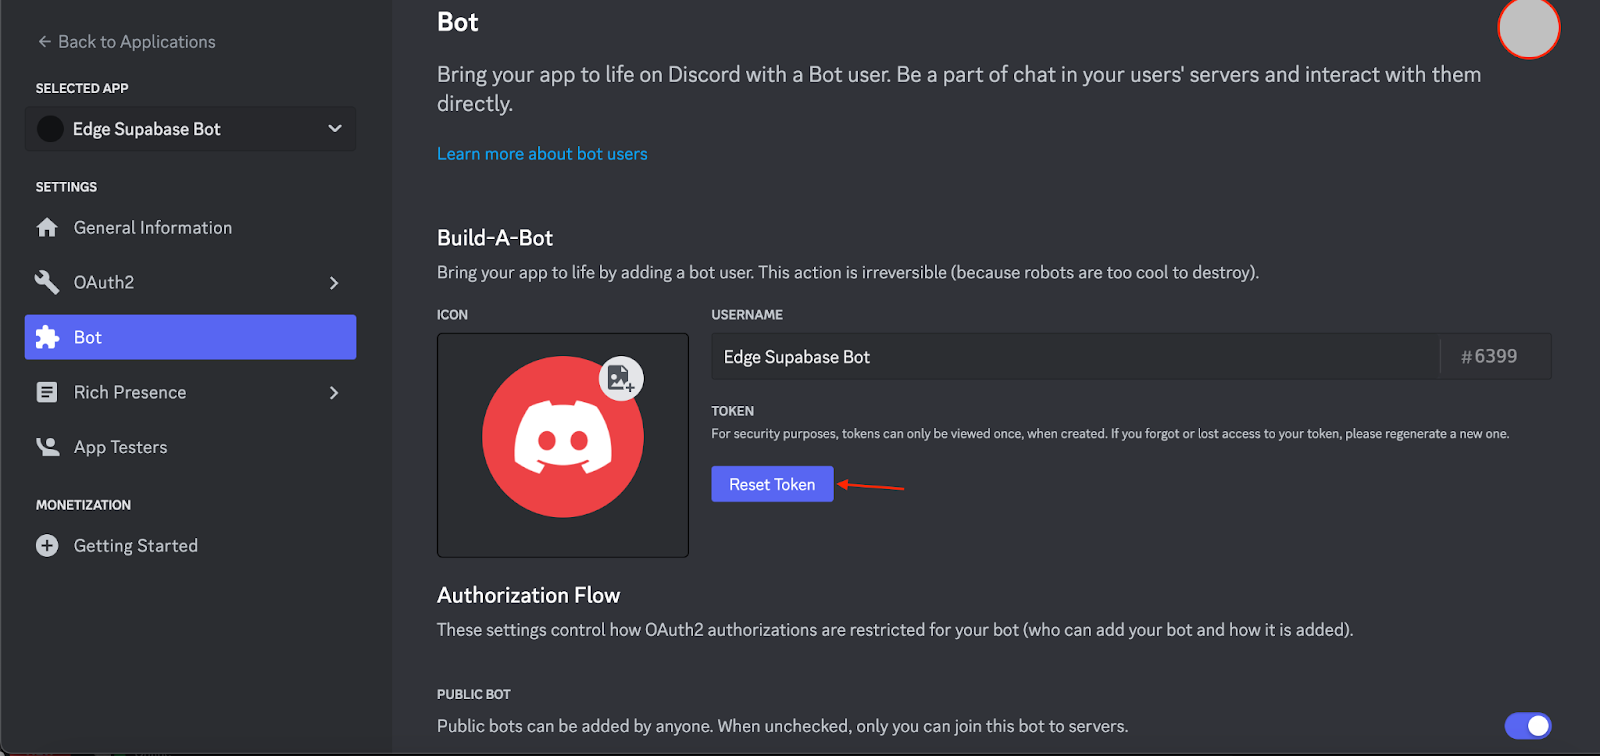
Next, you’ll also need to retrieve your DISCORD_TOKEN variable. To do this, navigate to the side menu of your dashboard and select Bot. Then, click on the Reset Token button:
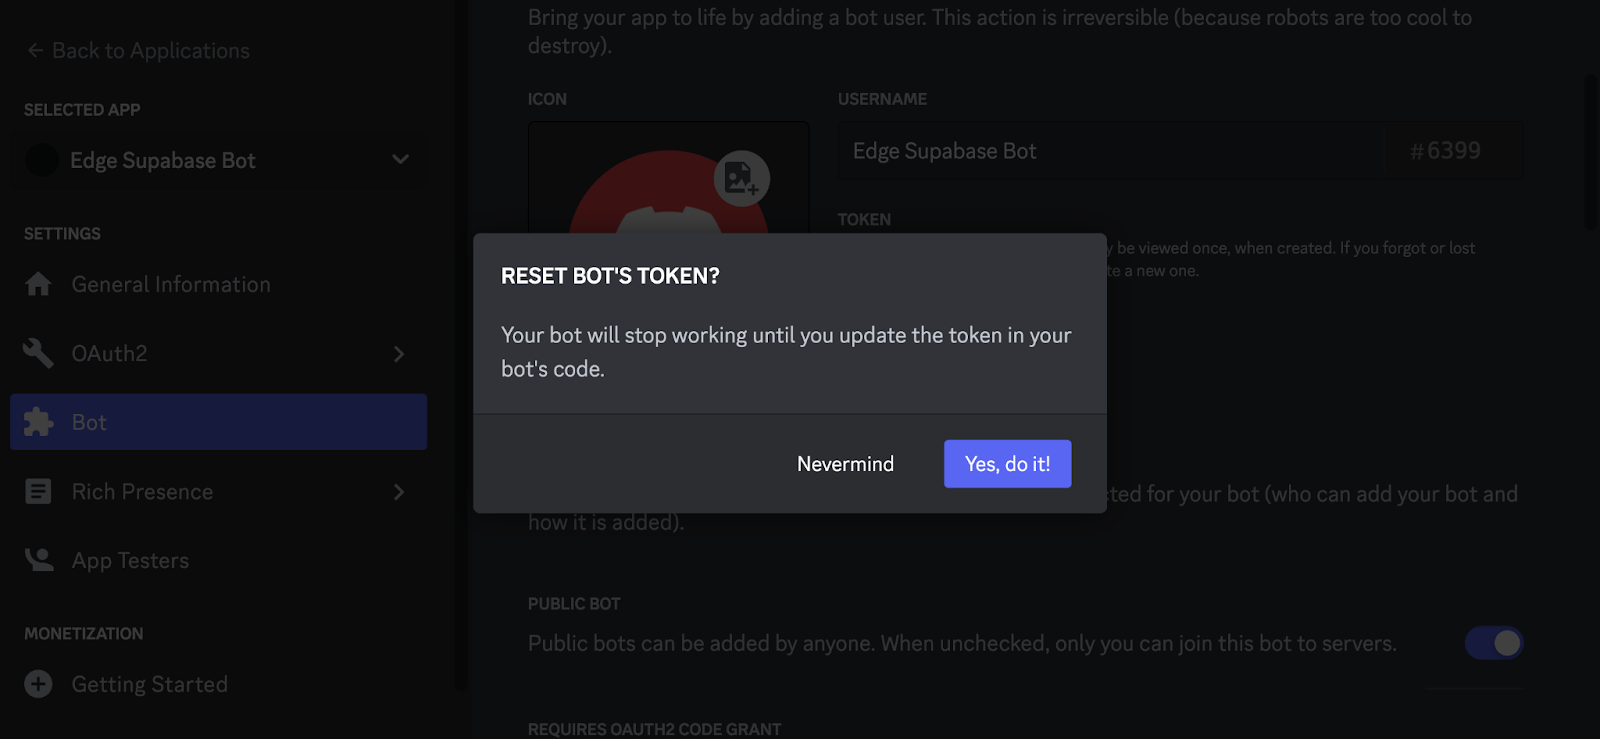
Once you do that, you’ll see the following message. Click on the Yes, do it button:
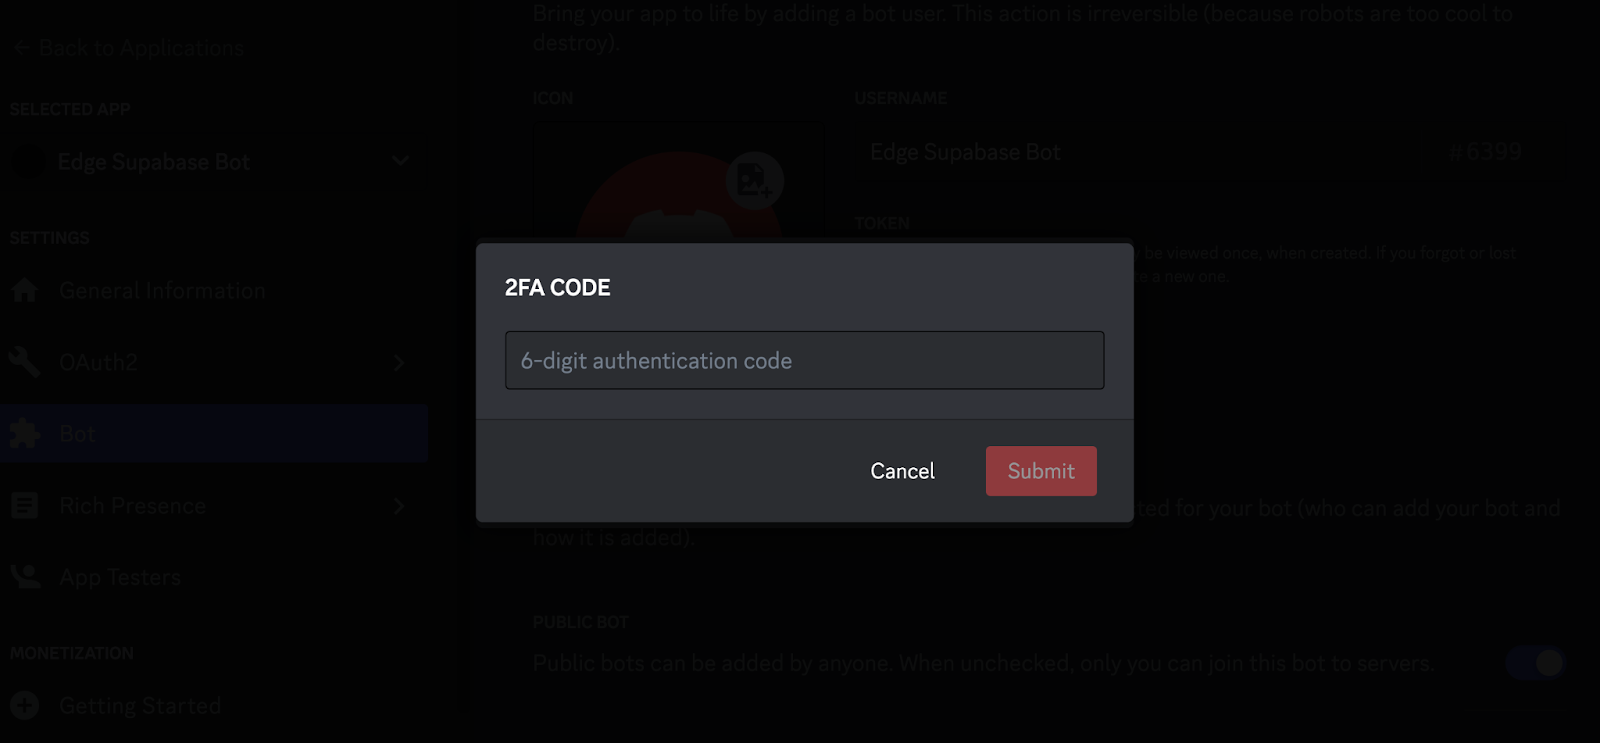
Once you do that, you’ll be required to enter a 6-digit authentication code. To get your code, check your 2FA application or whichever verification method you use and copy the authentication code. Then, enter the code and click on the Submit button:
Afterwards, you’ll be redirected back to your Bot section with your token generated. Click the Copy button to copy your token:
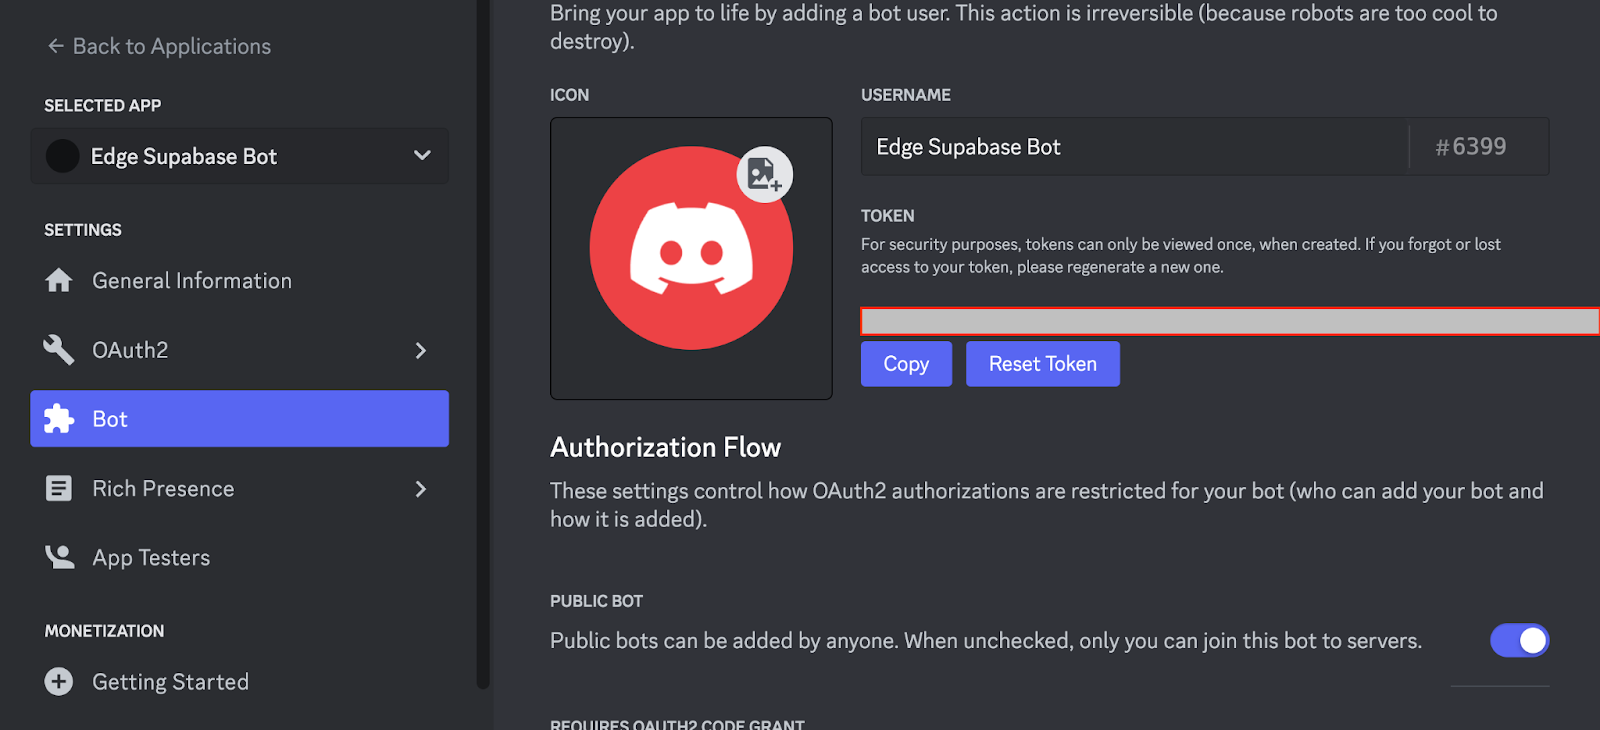
You’ll use this token as your DISCORD_TOKEN variable for your Edge function later on.
Creating An Edge Function For Your Discord Command Bot
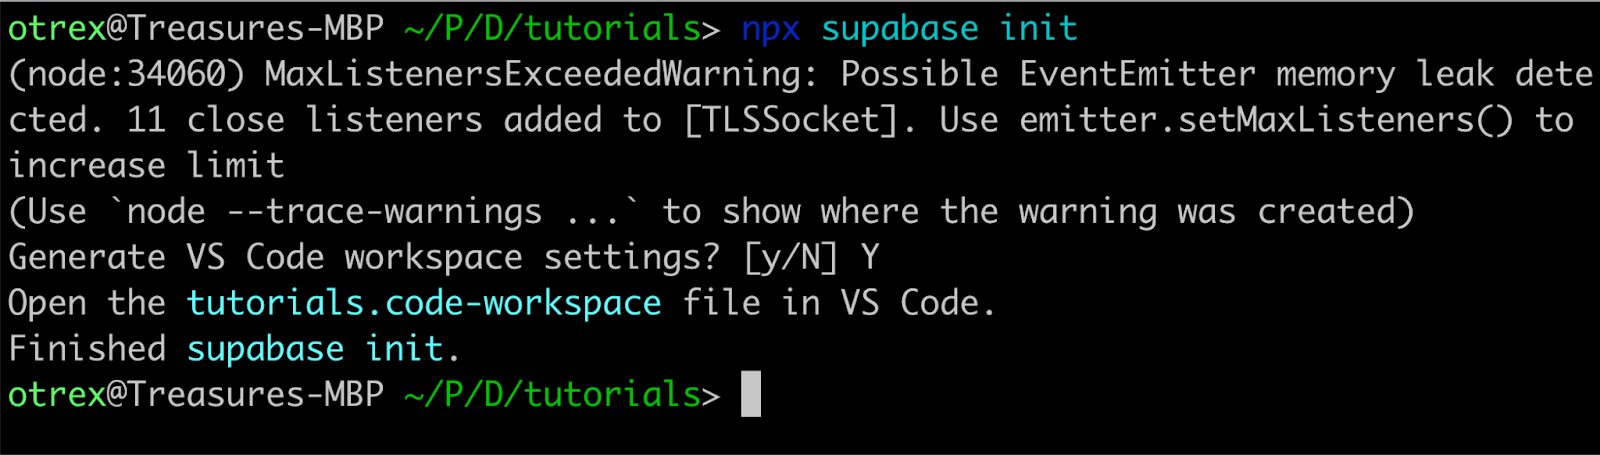
To create an Edge Function for your discord command bot, you’ll need to run the following command in your terminal to initial your supabase app:
npx supabase init
Once you run the command, a folder called supabase will be created on your local machine:
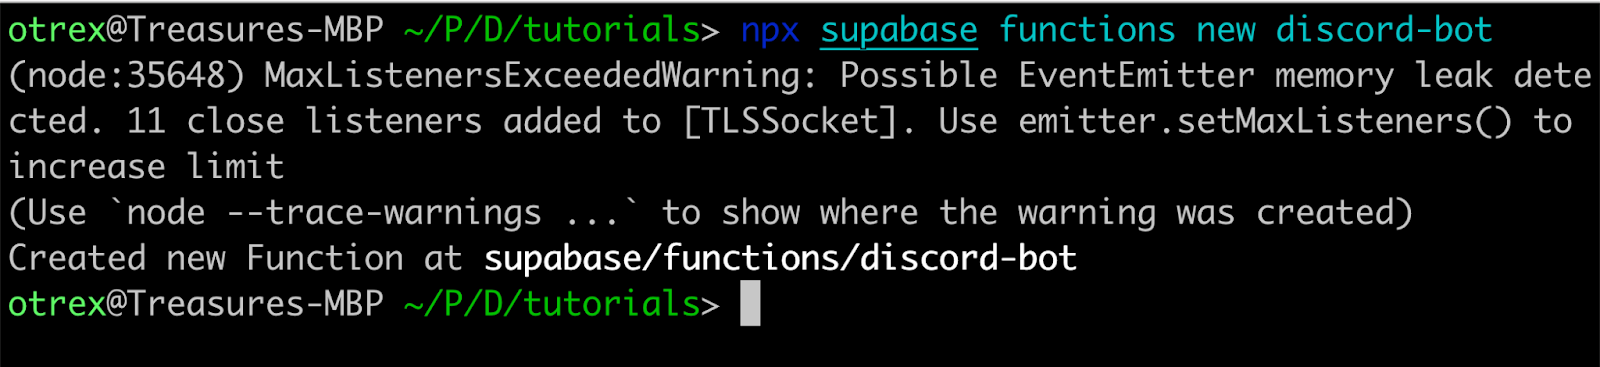
The next step is to create a function inside the supabase folder by running the following command:
npx supabase functions new discord-bot
Once you run the command, the following will be displayed in your terminal:
Now, that you have your supabase application on your local machine, change your current working directory to the supabase project’s folder by running the following command:
cd supabase
Afterwards, open the supabase folder in your code editor and you’ll see the following folder structure:
supabase
└── functions
 └── discord-bot
       └── index.ts
 └── config.toml
 └── seed.sql
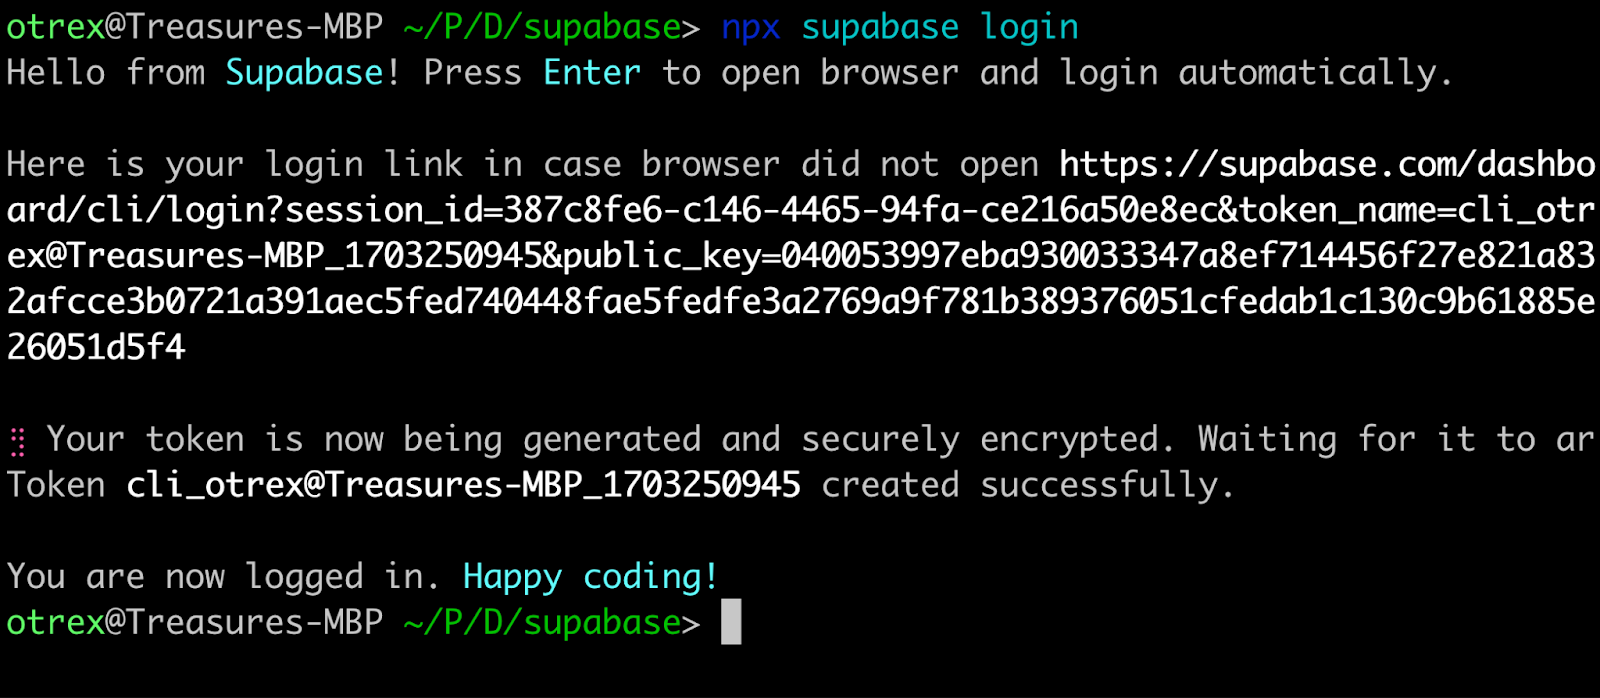
Next, you’ll need to login your supabase account by running the following command in your project directory:
npx supabase login
Once you run this command, you’ll see the following link displayed in your terminal to authenticate your Supabase account. Open the link in your browser:
Next, create a utils.ts file in the functions/discord-bot directory then add the following code that creates the Edge Function:
import { validateRequest } from 'https://deno.land/x/sift@0.6.0/mod.ts'
import nacl from 'https://cdn.skypack.dev/tweetnacl@v1.0.3?dts'

/** Verify whether the request is coming from Discord. */
export async function verifySignature(request: Request): Promise<{ valid: boolean; body: string }> {
  const PUBLIC_KEY = Deno.env.get('DISCORD_PUBLIC_KEY')!
  const signature = request.headers.get('X-Signature-Ed25519')!
  const timestamp = request.headers.get('X-Signature-Timestamp')!
  const body = await request.text()
  const valid = nacl.sign.detached.verify(
    new TextEncoder().encode(timestamp + body),
    hexToUint8Array(signature),
    hexToUint8Array(PUBLIC_KEY)
  )

  return { valid, body }
}

export enum DiscordCommandType {
  Ping = 1,
  ApplicationCommand = 2,
  ChannelMessageWithSource = 4
}

export async function validate(request: Request) {
  const { error } = await validateRequest(request, {
    POST: {
      headers: ['X-Signature-Ed25519', 'X-Signature-Timestamp'],
    },
  })

  return error
}

/** Converts a hexadecimal string to Uint8Array. */
function hexToUint8Array(hex: string) {
  return new Uint8Array(hex.match(/.{1,2}/g)!.map((val) => parseInt(val, 16)))
}
The above code snippet consists of a verifySignature function, which verifies that the incoming request is from a discord server. The verification specification can be found in the discord documentation.
The next function is the validate() function. This function validates the request, ensuring that it's a POST request. Next, Navigate to your index.ts file to add the handler for your function. Add the following:
import { json, serve } from 'https://deno.land/x/sift@0.6.0/mod.ts'
import { verifySignature, DiscordCommandType, validate } from './utils'

serve({
  '/discord-bot': async function (request: Request) {
    const error = await validate(request);
    if (error) {
      return json(
        { error: error.message },
        { status: error.status }
      )
    }

    // verifySignature() verifies if the request is coming from Discord.
    const { valid, body } = await verifySignature(request)
    if (!valid) {
      return json(
        { error: 'Invalid request' },
        { status: 401 }
      )
    }

    const { type = 0, data } = JSON.parse(body)

    if (type === DiscordCommandType.Ping) {
      return json({ type: 1 });
    }

    if (type === DiscordCommandType.ApplicationCommand && data.name === 'jokes') {
      const response = await fetch("https://v2.jokeapi.dev/joke/Any?type=twopart");
      const result = await response.json();

      return json({
        type: DiscordCommandType.ChannelMessageWithSource,
        data: { content: `${result.setup} ==> ${result.delivery}` },
      })
    }

    return json({ error: 'bad request' }, { status: 400 })
  },
})
In the snippet above, both the signature verification and request validation is carried out. If the invalid, an error message is sent back to the requester. After that, the request body is converted to JSON. if the type field of the request is equivalent to the Application discord command type, and the name is ‘jokes’, the endpoint to fetch jokes is called, and its result is sent back to the discord server.
Extracting Your Project ID From Supabase
To be able to deploy your Edge function, you need to get your project ID by navigating to your dashboard and clicking the Settings menu:
In the Settings section, you’ll find your project ID tagged Reference ID as shown below. click the Copy button next to it to copy the ID as shown below:
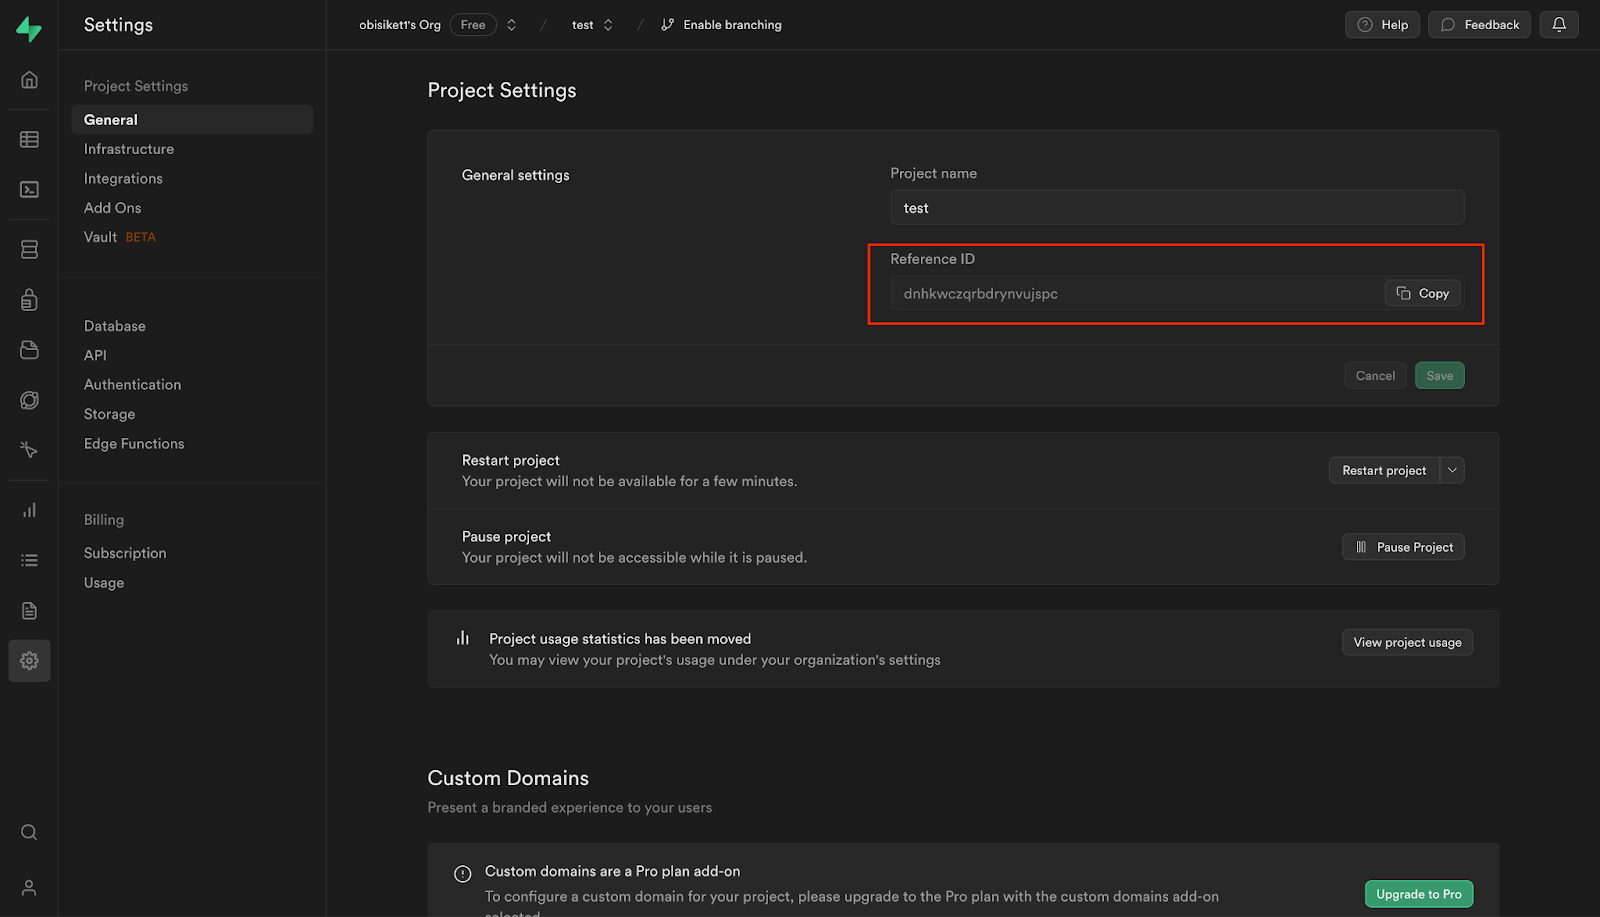
Once you copy your project ID, store it in a safe place, as you will use it later in the tutorial.
Deploying Your Edge Function
Once the set up is completed, run the following command to deploy your function to supabase:
npx supabase functions deploy discord-bot --no-verify-jwt --project-ref <project-id>
After this, you’ll notice that your function has been deployed:

Next, add your function environment variables by running the following command:
npx supabase secrets set DISCORD_PUBLIC_KEY=<discord_public_id>
You will be required to enter your project ID. Use the project ID retrieved during the previous section:

Registering Your Command On Discord
To register your command on Discord, navigate to your terminal and run the following command:
BOT_TOKEN=<discord-token>
CLIENT_ID=<application-id>
curl -X POST \
-H 'Content-Type: application/json' \
-H "Authorization: Bot $BOT_TOKEN" \
-d '{"name": "jokes", "description": "Crack a joke!"}' \
"https://discord.com/api/v8/applications/$CLIENT_ID/commands"
Replace the BOT_TOKEN and CLIENT_ID with the appropriate value before executing the command:

Adding Your Edge Function Domain To Discord
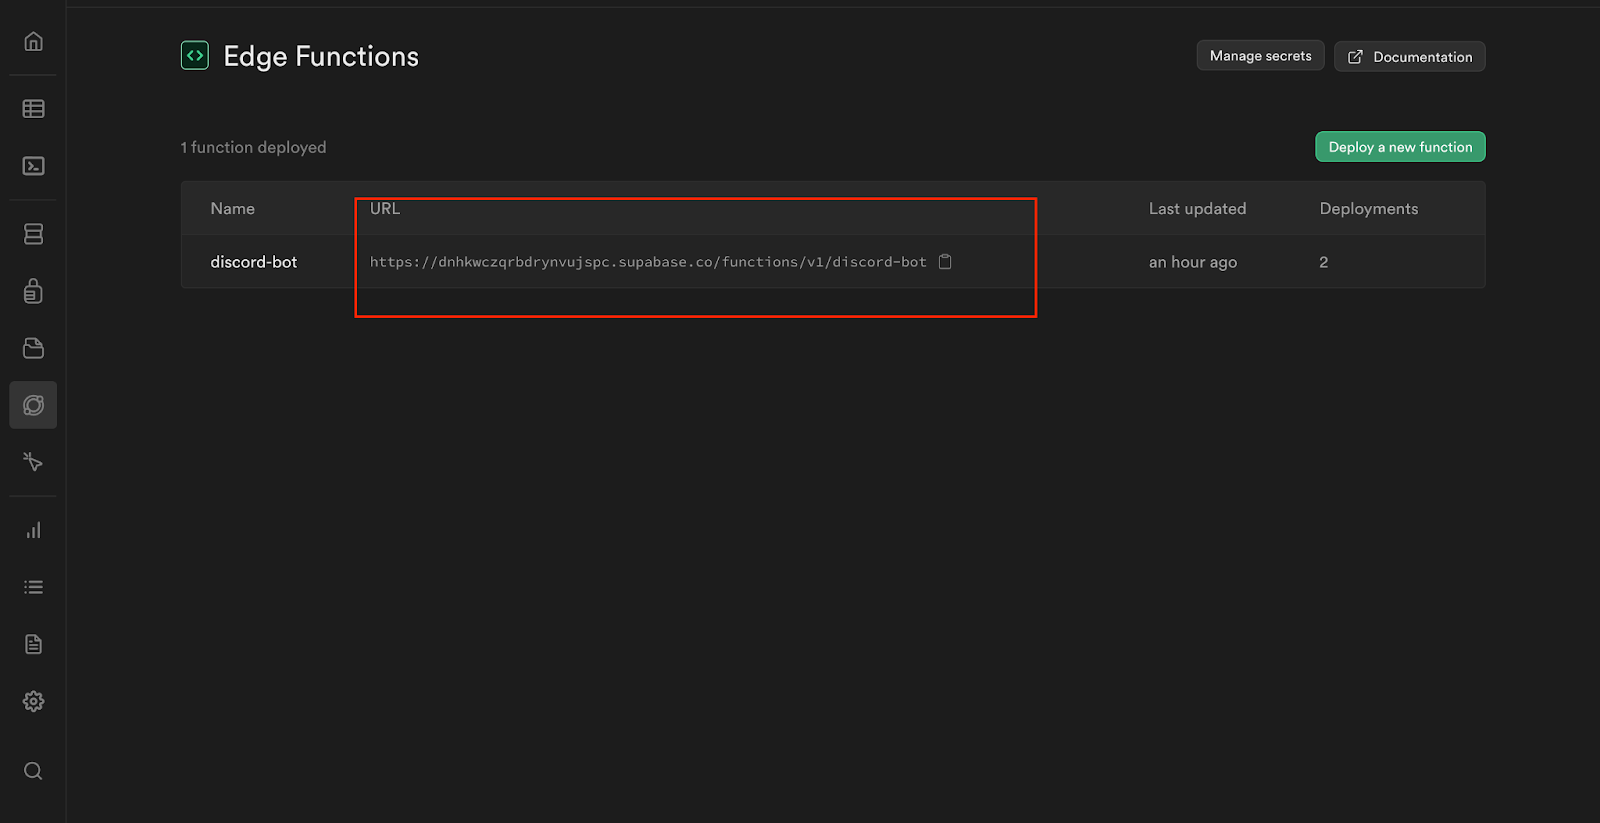
To retrieve your Endpoint URL that will serve as your domain, go to your supabase dashboard, and navigate to the Edge functions menu:
After that, select our discord-bot function from the list of functions, then copy your Endpoint URL:
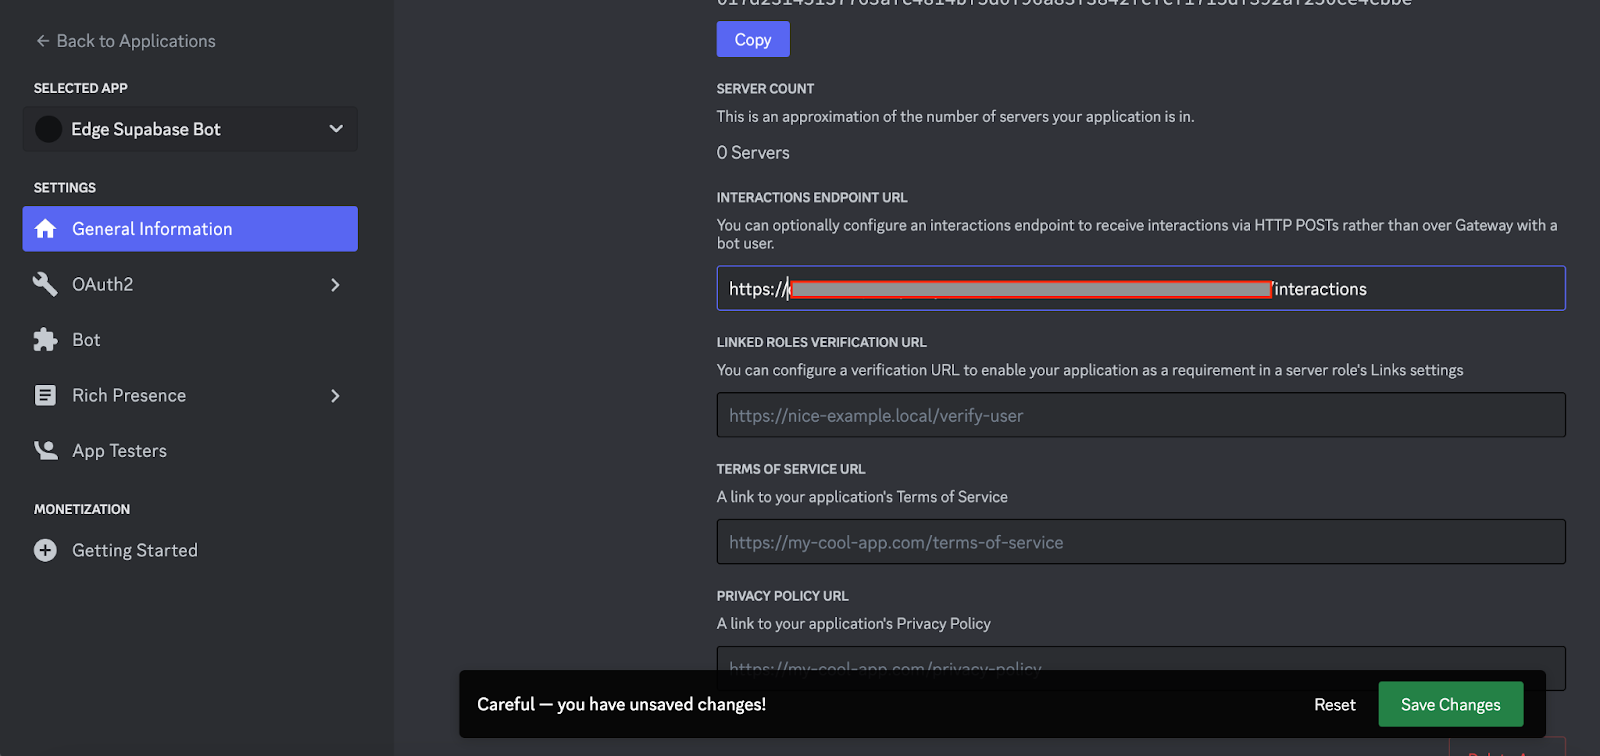
Now, you need to configure an interactions endpoint to receive interactions via HTTP POSTs rather than over Gateway with a bot user. To do this, return to your Discord developer portal and click on General Information on the side menu. Then, scroll down to the Interactions Endpoint URL as shown below:
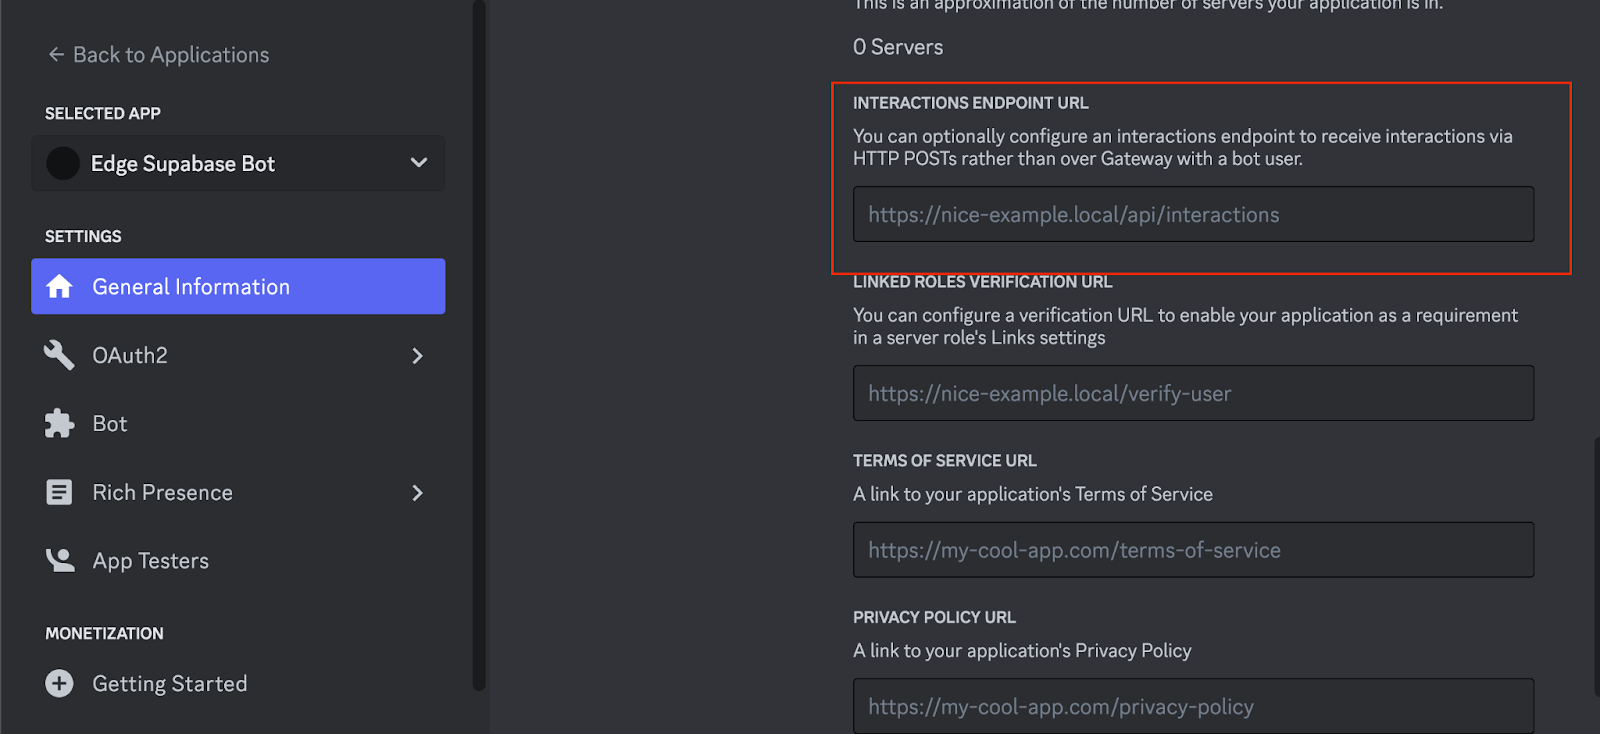
Next, paste the link to the domains that you previously copied in the box. This will configure an interactions endpoint by adding the https:// in front of it and the “interactions” endpoint at the end. Your link should look like this: https://[your domains]/interactions. Once you paste the link, save your changes by clicking the Save Changes button as follows:
Generating Your Discord Bot Link
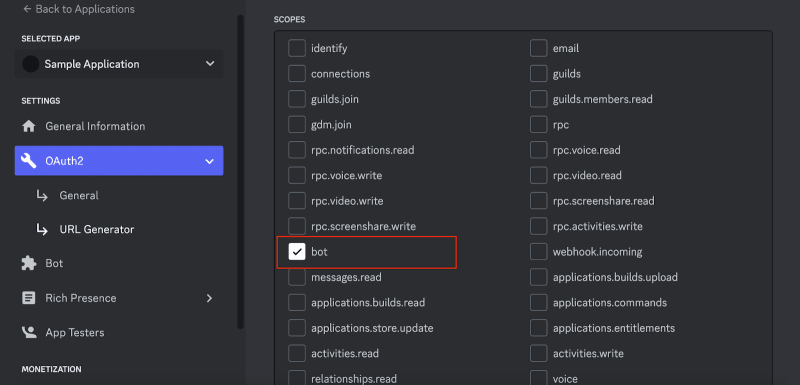
To generate a URL for your discord bot, you’ll need to select the scopes and permission required for your application to function. Navigate to the side menu on your discord dashboard and select OAuth2. Then, in the dropdown menu, select the URL Generator and select bot from the SCOPES section:
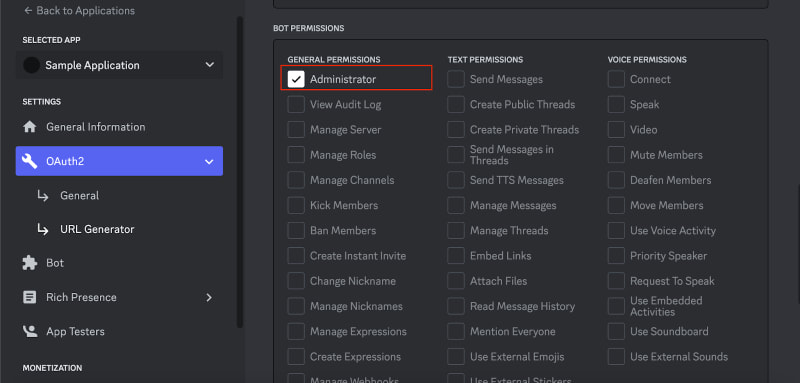
Next, select the Administrator under the Bot Permissions section:
After selecting your scope and bot permissions, a URL will be generated. Scroll down to the page’s bottom and click the Copy button to copy the URL:
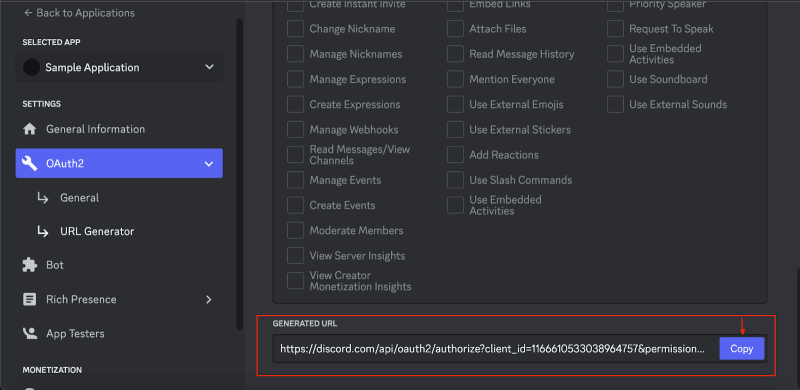
Now, you can visit the URL in your browser and you will be directed to your server on Discord where you’ll be able to add commands to your Discord command bot using Supabase Edge Functions.
Conclusion
Finally! You’ve come to the end of this tutorial where you learned how to use the Supabase Edge Functions which makes the process of building a Discord command bot seamless. With this information, you can easily add commands to your discord server.


