Build A CRUD App with Express And Supabase

I’m a front-end developer and technical writer based in Germany. I currently use react - my favourite framework - and styled-components as my main tech stack on the job.
I like helping newbies grow to become the developers they want to be and land their desired tech jobs. One of the ways I do this is by hosting Twitter spaces (#NewbiesInTech) so that they can learn from experienced developers and be in the know.
I also like reading and sharing my knowledge in different ways (articles, tweets, code snippets etc). I'd keep this bio updated as often as I can.
Even though I'm a Frontend Developer, I've always wanted to know how the backend (BE) works and I've over time tried some server-side technologies like Express with MongoDB, ASP.NET (C#) and Laravel (PHP). But my most recent contact was when I got a take-home test from an interview: I was tasked to build a simple blog API with a relational database like Postgres. So I decided to use Supabase since it runs on Postgres.
In this tutorial, you'll learn how to create a CRUD API with Express and Supabase. As described in the official documentation, Express is one of the most popular web frameworks built on top of Node.js for web and mobile applications. It simplifies creating a server, routing and middleware already available in Nodejs.
CRUD is a common way of referring to a set of operations that is executed by the server. The acronym stands for create, read, update and delete. The following table below summarizes recommended return values of their corresponding HTTP methods with resource URLs:
|------------|-----------|---------------------|----------------------------|
| CRUD       | HTTP Verb | Entire Collection   | Specific Entry             |
| OPERATION  |           | (e.g. /articles)    | (e.g. /articles/:id)       |
|------------|-----------|---------------------|----------------------------|
| Create     | POST      | 201 (Created)       | 404 (Not Found) or         |
|            |           |                     | 409 (Conflict)             |
|------------|-----------|---------------------|----------------------------|
| Read       | GET       | 200 (OK)            | 200 (OK)                   |
|            |           |                     | 204 (No Content)           |
|------------|-----------|---------------------|----------------------------|
| Update     | PUT       | 405                 | 200 (OK) or                |
| /Replace   |           | (Method Not Allowed)| 204 (Not Content)          |
|------------|-----------|---------------------|----------------------------|
| Update     | PATCH     | 405                 | 200 (OK) or 404 (Not Found)|
| /Modify    |           | (Method Not Allowed)| 204 (No Content)           |
|------------|-----------|---------------------|----------------------------|
| Delete     | DELETE    | 405                 | 200 (OK) or                |
|            |           | (Method Not Allowed)| 404 (Not Found)            |
|------------|-----------|---------------------|----------------------------|
What Is Supabase and Why Should You Choose It?
Supabase is an open-source backend service that provides a suite of tools to help developers build and scale applications quickly which includes:
Database: every project uses Postgres under the hood, which is a relational database.
Authentication: you can add login and sign-up to your app.
Storage: you can store, organise and serve large files.
Edge functions: these execute the closest code to your users for a fast experience.
We'll be using Supabase with the Express app.
Prerequisites
To get started with this tutorial, you'll need to have the following set up/installed:
Express and Supabase will be installed as dependencies as after setting up the project. So Let's get started.
Project Setup
First, create a new folder and initialize a new Node.js project using the command below.
mkdir supabase-crud && cd supabase-crud
npm init -y
The command creates a folder called supabase-crud and initializes a Node.js project with a package.json file which should look like this:
{
  "name": "supabase-crud",
  "version": "1.0.0",
  "description": "",
  "main": "index.js",
  "scripts": {
    "test": "echo \"Error: no test specified\" && exit 1"
  },
  "keywords": [],
  "author": "",
  "license": "ISC"
}
You don't have to, but you could update the json file like the description and author. Something like:
{
  "description": "Express app with Supabase",
  "author": "John Ademoye",
}
Create a new file in the folder and name it server.js. This will serve as the entry point to your Node.js application.
Install Express and Other Dependencies
Now install the express library and spin up a server with the following code:
import express from "express";

const app = express();

app.get("/", (_, response) =>
  response.json({ info: "Express app with Supabase" })
);

app.listen(3000, () =>
  console.log(
    new Date().toLocaleTimeString() + `: Server is running on port ${3000}...`
  )
);
The above code returns { info: "Express app with Supabase" } under the "/" route and logs Server is running on port 3000... on the terminal with a timestamp.
Now let's see if that's the case. Run the app with:
node server.js
If everything goes well, you should get something like this with REST Client:

You could also go to the URL in your browser and you should get the same response:

But I prefer using REST Client because I won't have to switch windows.
Every time I change server.js, I'll have to rerun the file. So to avoid having to do that, install nodemon to watch the file for changes. Although Node v18.11.0 has watch mode built in, it is still experimental.
I'd also like to save the port number as an environment variable in a dotenv file as well as other constants like the database URL and KEY. DotEnv is a package that automatically loads environment variables from the .env file into the process.env object.
So install DotEnv using the command: npm i dotenv. Then in your app, require and configure the package like this:
import express from "express";
import env from "dotenv";

env.config();

const app = express();

app.get("/", (_, response) =>
  response.json({ info: "Express app with Supabase" })
);

app.listen(process.env.PORT, () =>
  console.log(
    new Date().toLocaleTimeString() +
      `: Server is running on port ${process.env.PORT}...`
  )
);
To use nodemon, open the package.json file and modify the scripts with following configuration:
"scripts": {
    "dev": "nodemon server.js"
  },
And this is how the project folder structure looks:
📁 SUPABASE-CRUD
∟📁 node_modules
∟📄 .env
∟📄 package-lock.json
∟📄 package.json
∟📄 requests.http
∟📄 server.js
Setting Up Supabase
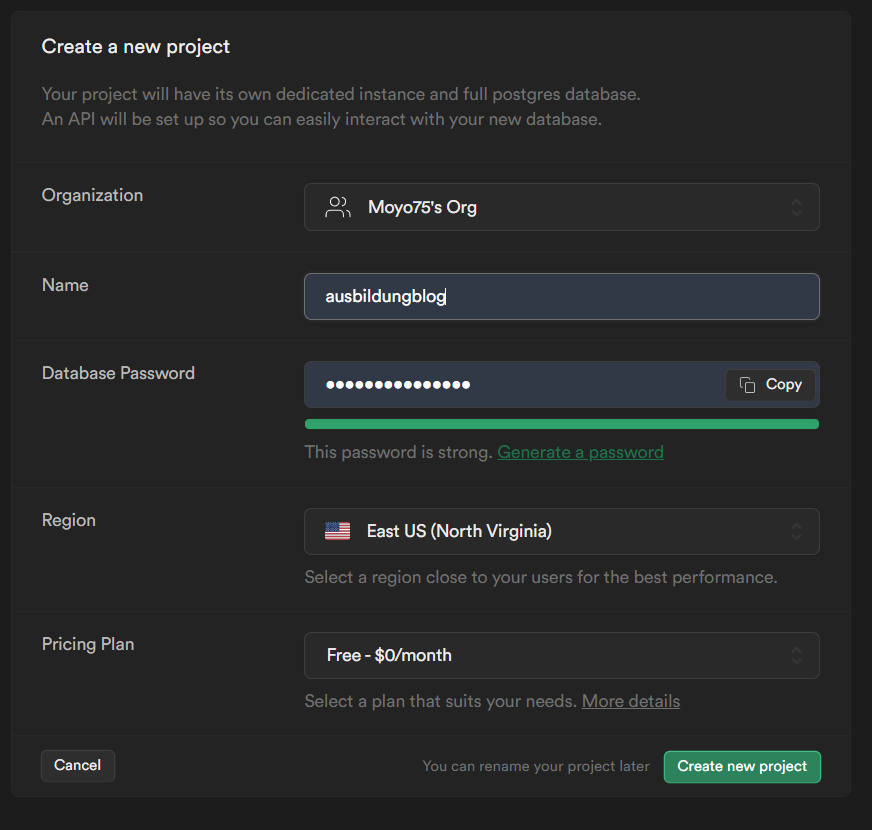
After creating a Supabase account, you are prompted to a dashboard upon signing in, which contains all projects. If it's your first time using Supabase, you shouldn't see any projects there. So create a new project:

Projects are groupped under organizations. Create an org if you don't have one yet; I already have an org.

Then create a new project and name it supabase-crud. The password is automatically generated, so just submit the form after creating the project.
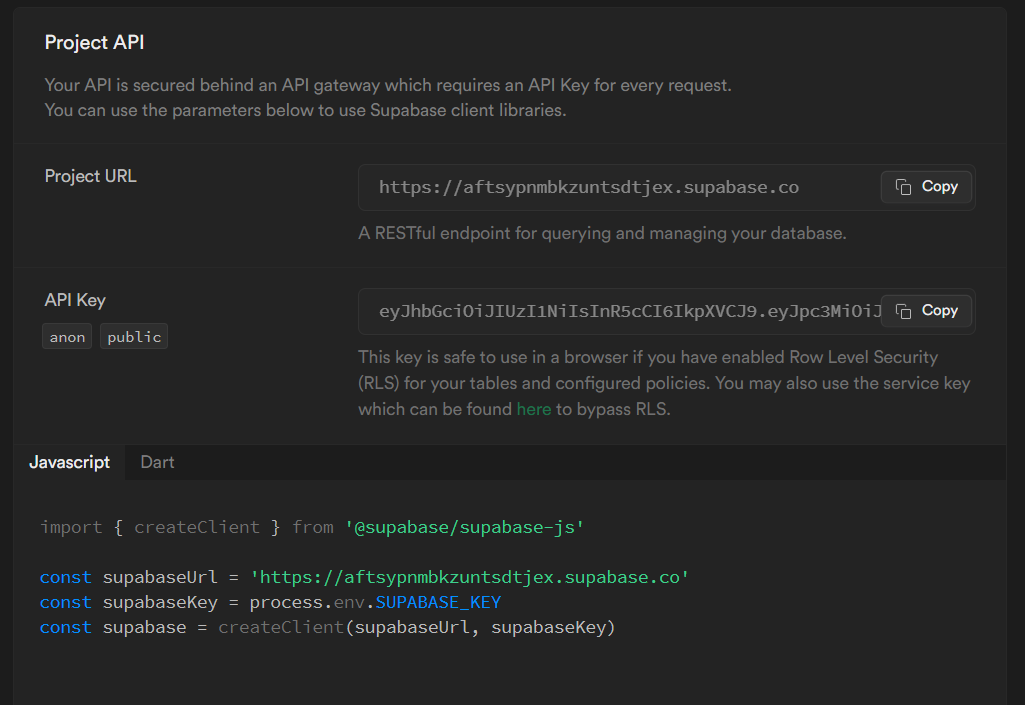
Now supabase-crud has its page. Scroll down to the Project API section where the URL and API key can be found. Copy the URL and Key and save them as DATABASE_URL and DATABASE_KEY respectively in the .env file.
Now go back to the top of the project page. Go to the Table though the Table editor button and create a new table:

Name the table posts and a description like A blog database is fine.
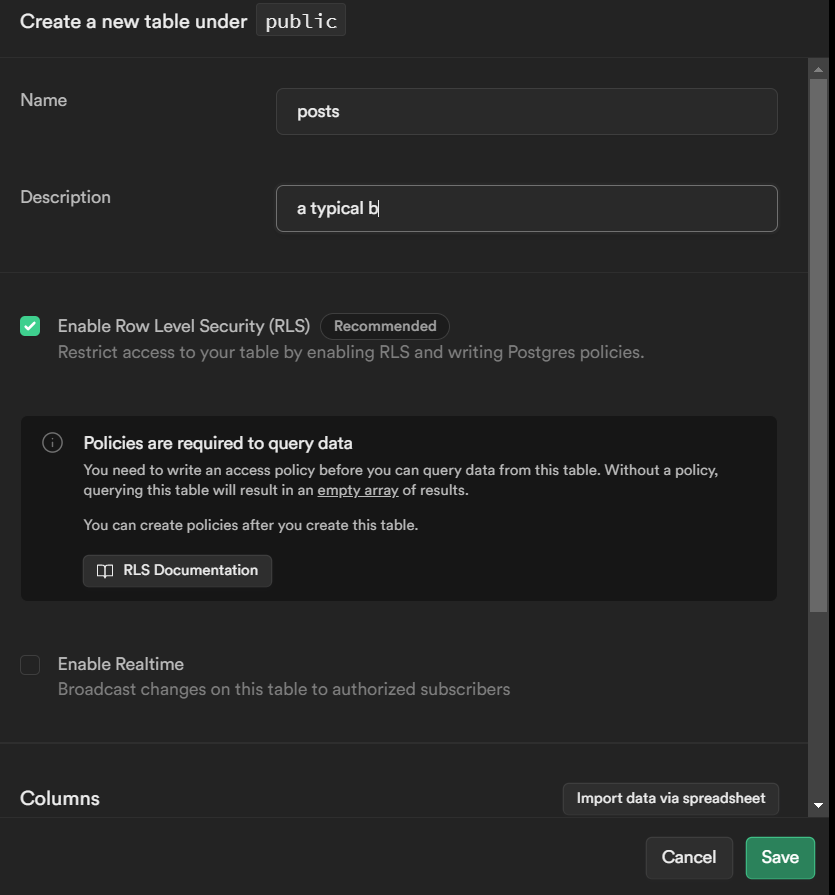
Create additional columns for title and body and then save.

Insert a row with some dummy data for title and body manually and then save.

Setting Up Supabase In The Application
First of all, Install the library:
npm install @supabase/supabase-js
Then import createClient to establish the connection with the database. createClient takes the database URL and Key as arguments:
import { createClient } from '@supabase/supabase-js'

const supabase = createClient(process.env.DATABASE_URL,process.env.DATABASE_KEY);
And the server file looks like this so far:
import express from "express";
import env from "dotenv";

import { createClient } from "@supabase/supabase-js";

env.config();

const supabase = createClient(process.env.DATABASE_URL,process.env.DATABASE_KEY);

// Services

app.listen(process.env.PORT, () =>
  console.log(
    new Date().toLocaleTimeString() +
      `: Server is running on port ${process.env.PORT}...`
  )
);
Creating the Routes
We'll be defining the routes for these handling CRUD operations:
Get all articles
Get an article
Post an article
Update an article
Delete an article
We'll be using the Supabase documentation as a guide here:
- To get all articles, specify the table from they're coming from an use the select method on it without any arguments.
// Get all articles

app.get("/articles", async (_, response) => {
  try {
    const { data, error } = await supabase.from("posts").select();
    console.log(data);
    return response.send(data);
  } catch (error) {
    return response.send({ error });
  }
});
- To get a particular article, specify again the source table and use
select. Then pass the id from the URL, which can be accessed viarequests.params.id, as an argument toeqto get the article whoseidequals that in the params object.
// Get an article

app.get("/articles/:id", async (request, response) => {
  try {
    const { data, error } = await supabase
      .from("posts")
      .select()
      .eq("id", request.params.id)
    console.log(data);
    return response.send(data);
  } catch (error) {
    return response.send({ error });
  }
});
- To post an article, you'll need to specify the
titleandbodyin the payload, which can be accessed through the request object. Then pass that to the insert method, which then writes to the database. If there's an error, it's returned with a status code of 400.
// Post an article

app.post("/articles", async (request, response) => {
  try {
    console.log(request.body);
    const { data, error } = await supabase.from("posts").insert(request.body);
    if (error) {
      return response.status(400).json(error);
    }
    response.status(200).json(request.body);
  } catch (error) {
    response.send({ error });
  }
});
- To update a particular article, whose
idis passed in the URL, check with the ternary operator what needs to be updated. Then select the article to update witheq.
// Update an article

app.put("/articles/:id", async (request, response) => {
  console.log(request.params);
  try {
    const { data: updatedData, error: updatedError } = await supabase
      .from("posts")
      .update({
        title: request.body.title ? request.body.title : data[0].title,
        body: request.body.body ? request.body.body : data[0].body,
      })
      .eq("id", request.params.id);
    const { data, err } = await supabase.from("posts").select();
    return response.status(200).send(data);
  } catch (error) {
    response.send({ error });
  }
});
- To delete an article, the
idis needed too; do this with the Supabase delete function. Make the deletion first and then get all the articles, which no longer contains the deleted article.
// Delete an article

app.delete("/articles/:id", async (request, response) => {
  try {
    const { data, error } = await supabase
      .from("posts")
      .delete()
      .eq("id", request.params.id);
    const { datar, errorr } = await supabase.from("posts").select();
    if (error) {
      return response.status(400).json(error);
    }
    return response.send(datar);
  } catch (error) {
    response.send({ error });
  }
});
Conclusion
In this article, you learned how to make a CRUD app using Express and Supabase. It started out by introducing the relevant technologies: Express and Supabase, also highlighting reasons why you should use Supabase in your projects.
The article also covered spinning up an Express server, setting up a Supabase project and creating the routes handling the necessary CRUD operations for the application.
This app was published on the Supabase Launch Week. I had already built a similar app about 4 months ago, so I didn't bother pushing this particular one to GitHub. So feel free to clone the original project and see how it works.
I hope that this article is helpful and you learned something from it. Being a technical writer and content creator I am passionate about sharing my knowledge (including tips and advice) and helping other people achieve their goals, especially those just starting out in tech. You can connect with me on my social media profiles and blogs here.


